
With all the uncertainty surrounding park openings in the COVID times of now, I have been wracking my brain for ways to potentially keep our children busy and OUT of our house and OFF of screens of any sort. We have been in our new home a little over a year now and when we moved, we left or donated items that we no longer needed or used – and one of the items on that list was a SAND BOX. We have had a few over the years, starting with a garage sale red crab for little K and then later on I found another front yard find only this time it was a slate colored STEP ONE rock shaped sand box! It was not brought to the current Hunter Lodge as it had been jumped on a few too many times and was torn from a variety of boys activities including sticks.
That said, sans sand box we started to look into kits and plastic molded options. Everything is sold out – and if it isn’t sold out, it IS available in the hundreds of dollars range that I wasn’t looking at spending during COVID times for sand play. Even the kits to build the sand boxes were completely sold out (apparently if you make pools or sand boxes in 2020, you are ROLLING in the DOUGH!).


Enter Pinterest – and the plethora of seemingly simple diy sand boxes with built in benches, or elaborate play areas. There was even one that had a chalkboard included in it – shockingly, it didn’t make the cut. We needed ONE square box for play sand – just a box and maybe, if we wanted to get REALLL fancy some areas to sit down. Found this link to a great blog / sand box instruction list and headed out to Home Depot! Theirs was 10×10 and a little too big for what we wanted. So, We followed the same “ingredient list” as noted below and bought shorter pickets! (I included links to each item!)
- Cedar Fence Pickets – 8 (we bought 6 foot cedar pickets NOT CEDAR PLANKS and plan on cutting them to 4 foot lengths $2 ea)
- Sand (White Play Sand is what we went with – 7 x 30lb bags at $5 !)
- Outdoor Deck Screws (1 5/8″) – one box ($7)
- Galvanized Corner brackets – 4 ($3.50 each)
- Landscaping fabric – one roll – we have this at home and call ahead – since Home Depot was COMPLETELY OUT! But is about $15 a roll
Next step – and this is a good one – we left the supplies sitting in my car for 3 days. Crucial to let the supplies marinate, < wink > and is a common action for many of us attemptors of projects. In all seriousness – the pressure to get to projects is real – and taking any project in a series of steps over a few days makes the process easier! Mount Everest wasn’t climbed in a day!

Oddly enough, we chose Memorial Day to do this project and it was 85* and 80,000% humidity but a nice breeze – it was a labor of love! My husband started by drawing out a plan to create the 4 foot by 4 foot box and started to execute. At this point, I let him rock and roll with the power tools, kids, etc. as I had bigger fish to fry (organizing the garage while all of my children are engaged and actively participating with my husband was building them something motivated the heck outta me!).
We cut all the boards to length first then we added the 90 degree bracket – we attached the top on one board, and the bottom to the other board. We didn’t screw everything in too tight at the beginning, just half way to 2/3 of the way in – so that we can screw everything in tight at the end to make sure everything was square!


We added 12 inch dog eared pieces on the sides of each corner to add to the structure and also a little design. The kids got in on the fun here too and were able to participate throughout with drilling in the screws!

My husband had the idea to have us all sign the finished frame – and since it was Memorial day, my daughter added this!
We did have a few cedar boards laying around the house so we added them to the corners for 2 seats screwing them in and then cutting them flush with the box.


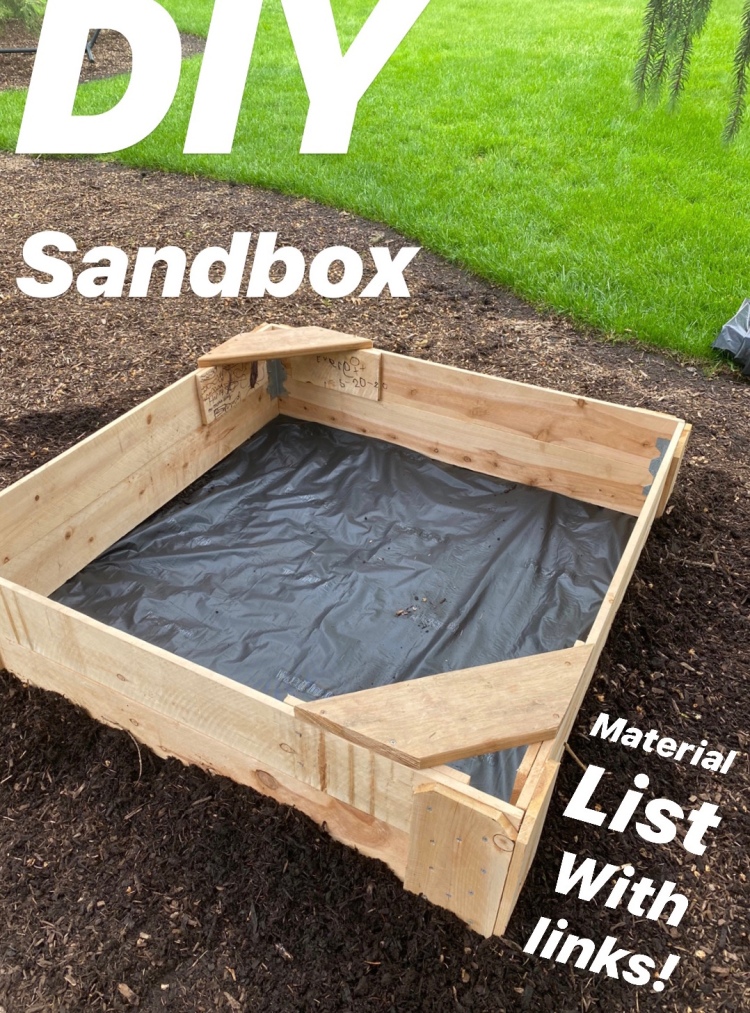
Once we picked a spot where we could see the kids playing, we raked back the mulch in a square shaped and dropped it in! We put the landscape fabric down and then a layer of plastic on top and stapled it to the sides. Once that was all secure, I raked back some of the mulch back towards the box to cover up any left over fabric. The intention here is keep water out with a cover so we aren’t worried about drainage (with the plastic on the bottom).

So there you have it! A DIY Sandbox! We do have a nice piece of that black plastic to keep it covered and keep all the spiders and other creepies out! Don’t forget we used cedar PICKETS not planks – fence pickets are not as sturdy as planks but since we aren’t building something that required much structure, we can get away with the thinner, less expensive wood. All in all the cost to build this (besides sweat equity) was about $80-90 (IF you have a saw and a drill already 😉) – compared to a kit to build this about $150 or a plastic green turtle – which were all sold out coincidentally (#covidtimes) – I am pretty happy with our results!


I love your blog. Very understandable and fun.
LikeLike